Page 1 of 8
3D print files
Posted: Sat May 09, 2020 10:50 am
by Pumping Now
I print with PLA, it's held up to hours of pumping.
West Marine Epoxy glues parts together
I use Sketchup for design, exports a STL file (Blender, Solidworks, Autocad also design...)
Cura is a slicer program, reads the STL, you verify all's OK, export GCODE
3D printer reads the GCODE & prints
If you don't have a 3d printer, there's printing services.. Adjust the design to fit your needs, verify dimensions & email to a
printing service
Google found Xometry, HP MJF 3D Printing Services - plenty out there.
Here's a form to fiberglass over; it'll take 2 1/2 days to 3d print. I haven't built this yet - no guarantee on structural strength...
Cock & ball tube form for fiberglass. Fiberglass is translucent when cured.
3D Print this form,
tape to a glass sheet,
apply mold release,
Draw flat perimeter on glass
fiberglass over including perimeter, remove from mold, fiberglass over again for both halves.
Add soft gasket to one half,
Drill & tap for Colder vacuum plug
No hinge - use binder clips
I'd suggest starting with a small version, just for practice.
Re: 3D print files
Posted: Sat May 09, 2020 10:53 am
by Pumping Now
Flared mouth
Can be sized to fit most any tube
I made one for a large acrylic candy jar
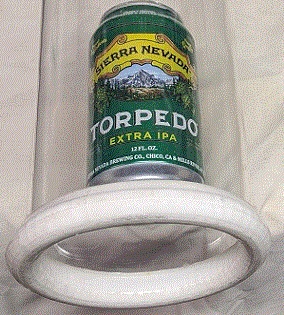
- MVIMG_20200508_180700 2.jpg (58.23 KiB) Viewed 12740 times
Re: 3D print files
Posted: Sat May 09, 2020 11:05 am
by Pumping Now
Warped mouth
Re: 3D print files
Posted: Sat May 09, 2020 11:07 am
by Pumping Now
Man purse
Clik the pic
Re: 3D print files
Posted: Sat May 09, 2020 11:12 am
by Pumping Now
Cock docking
Size to fit yours
Re: 3D print files
Posted: Sat May 09, 2020 11:37 am
by Pumping Now
Urethra tube
Size to fit,
Decorate the end !
 Viewed 12743 times")
- 17 mm dia
Re: 3D print files
Posted: Sun May 10, 2020 4:25 am
by Evythyme
I love the sounds!
Re: 3D print files
Posted: Sun May 10, 2020 6:53 am
by Pumping Now
Evythyme wrote: ↑Sun May 10, 2020 4:25 am
I love the sounds!
They're light & ribbed & hollow so they can stay in half a day... If too long uncomfortable sometimes. Shorter seems less infection chance. Can be tapered, too.
Size to fit you !
After printing, try some light bending to assure they won't break.
Re: 3D print files
Posted: Tue May 19, 2020 9:25 am
by Pumping Now
Made this in the last couple days..
I wanted something bigger than 4" inside yet easy to get out of.. This is 4 3/4" inside diameter.
The flare tapers from 4" to 3 1/2" diameter.
To exit, release pressure & slide out along with flare halves. As easy as exiting a straight tube.
To enter, put flare halves in tube & fold plastic over them into tube. Lube up & suck yourself in. I prefer balls first.
The rubber bands hold the plastic against the tube, providing the air seal. No other gaskets needed.
I'm too big to squeeze flare halves around my balls, then enter tube.
This concept should work with most any large straight tube. I'll try 6" next...
In use, the halves try to spread apart. I found an appropriate thickness rubber band put on the flare to keep it snug against the cylinder prevents spread.
 Viewed 12197 times")
- First try. Comfortable !
5"outside diameter, 1/8" wall thickness, 12" long plexiglass tube
5" diameter x 1/4" thick plexiglass round
1/8" NPT bulkhead & Colder fitting (not shown)
Everything, including 3d printer & laptop, available on Amazon.
Re: 3D print files
Posted: Tue May 19, 2020 10:14 am
by Pumping Now
I have this 6 3/4 diameter x 10" long canister, think I'll use it.
Gimme a week.
Re: 3D print files
Posted: Tue May 19, 2020 12:44 pm
by Pumping Now
Designed for 6 3/4" x 10" canister.. Amazon
OXO 1129880 Good Grips Airtight POP Round Canister (4.5 Qt),Large by OXO
Says it'll take 2 1/2 days to print on my machine. Woof!
I tie a few wraps stout string around the flat 'lands' to clamp the halves together.
Then thin plastic in & out over the flare, sealed on outside with rubber bands.
Untie to remove.
4" down to 3 1/2" entrance.
Leave a note about any success with printing services..
Re: 3D print files
Posted: Tue May 19, 2020 2:50 pm
by Pumping Now
Here's one from the thread 'Ideal Tube Design'..
This was from a year ago & not well set up for printing. It would have to be a right & left half, so twice the printing time. Also, it probably could only be used as a form & made from fiberglass or ?
Flanges would ruin the sexiness, but packed you'd never get out.
I'll give it another go & post the files soon.
- cvase 2.gif (4.95 MiB) Viewed 12142 times
Re: 3D print files
Posted: Thu May 21, 2020 3:47 am
by Brazilien
Interesting the project, but after a session with hot water, this tube would never come out.
[quote="Pumping Now" post_id=339736 time=1589871030 user_id=108933]
Here's one from the thread 'Ideal Tube Design'..
This was from a year ago & not well set up for printing. It would have to be a right & left half, so twice the printing time. Also, it probably could only be used as a form & made from fiberglass or ?
Flanges would ruin the sexiness, but packed you'd never get out.
I'll give it another go & post the files soon.
cvase 2.gif
[/quote]
Re: 3D print files
Posted: Thu May 21, 2020 4:00 am
by Pumping Now
Agreed... It would have to be halves.
Re: 3D print files
Posted: Fri May 22, 2020 10:27 am
by Pumping Now
Construction tips
I use a Creality CR10S, one of the larger printers. Fairly cheap, though.
My only experience is with PLA
If PLA is waxed enough or coated with mold release, fiberglass will pop off it. Or, leave the PLA as the finished inside surface.
All of my tube flares are just PLA with fiberglass resin painted on for a smoother finish. With 20% infill, they hold up fine.
I've had problems printing tall thin things.. The base eventually warps a bit warping everything. A whole or half a Bullmaster should print fine.
For a fiberglass mold, 1mm thick walls would be fine IF infill is at least 20%.. The infill holds the surface together.
I print layers .28 mm thick. Fiberglass resin smoothes them out nicely.
Clear filament fiberglassed over would be neat. Print half a bullmaster with the smooth inside facing up.
Remember you need left & right halves.
Tape the print, inside facing down, on a sheet of glass. Outline flanges about an inch outside the print. Fiberglass over the 3D print mold out to the flange perimeter. Add a vacuum connection too. Remove the fiberglassed part from the glass.
I use blue painters tape. Print & practice the technique on some small pieces.
I use 4 oz fiberglass cloth for intricate joints.
Solidworks is better than Sketchup designing organic forms with fillets.
I suggest Half a Bullmaster because they're difficult getting out of when packed.